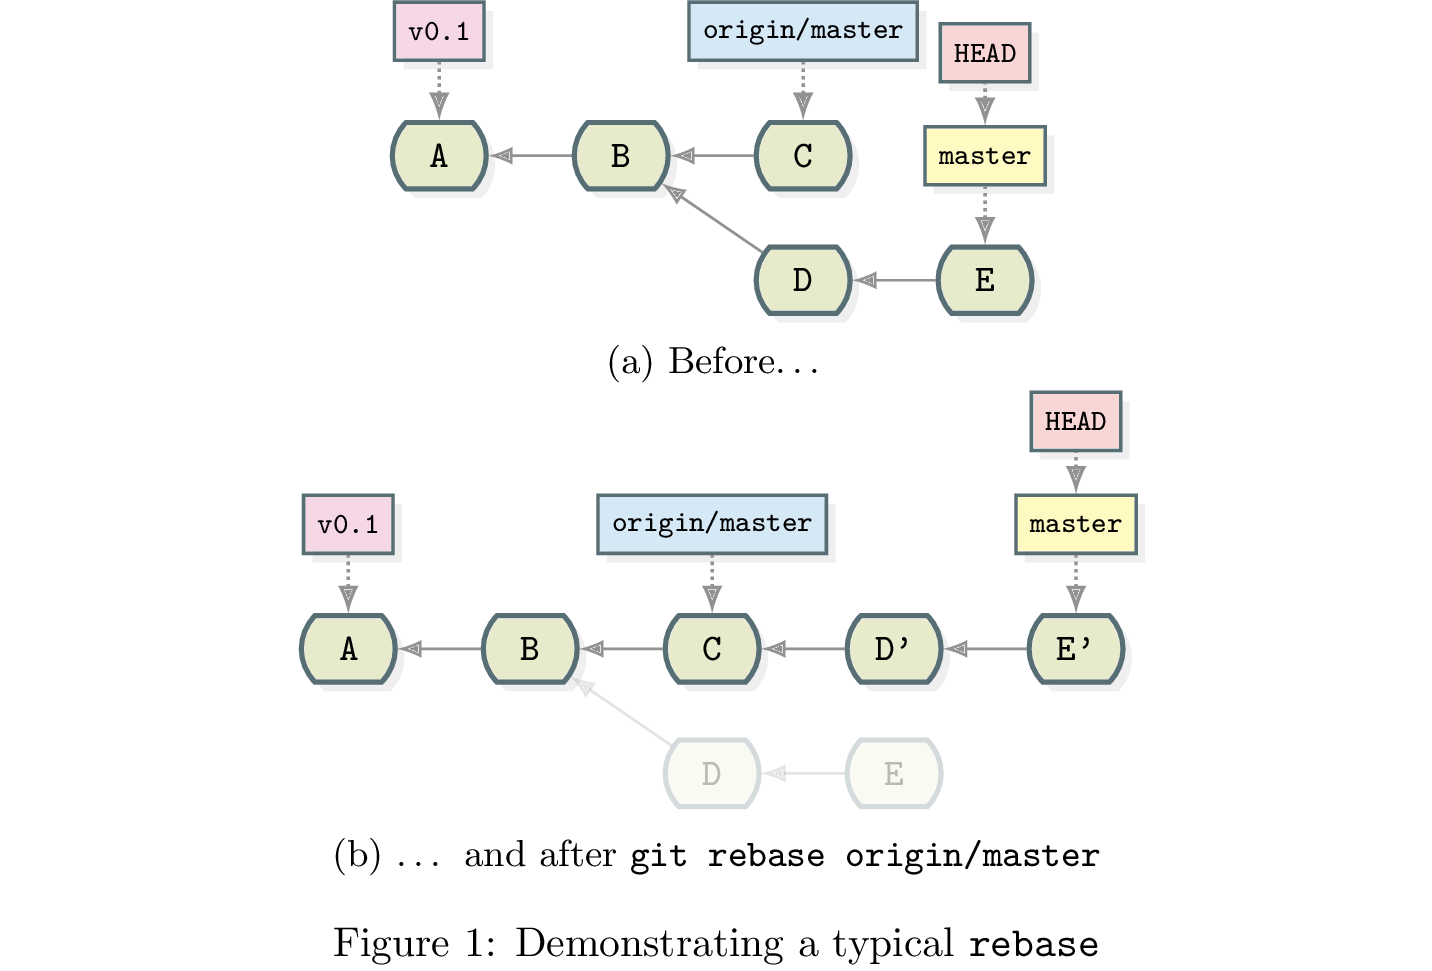
These instructions show how to run LaTeX on the example document and produce a PDF outout.
Gigdags requires three prerequsites * a LaTeX distribution, * the tikz package (v3.0 or later), * the xcolor-solarized package.
First, do NOT use apt-get to install. The best is to install TexLive from the Tex Users Groug (TUG).
Download the latest install file, using your wget or your browser.
~$ cd ~/Downloads
~/Downloads$ wget mirror.ctan.org/systems/texlive/tlnet/install-tl-unx.tar.gz
This will create the file install-tl-unx.tar.gz
Uncompress the gzip file:
~/Downloads$ tar xzf install-tl-unx.tar.gz
cd into uncompressed directory and run install-tl
~/Downloads$ cd install-tl-20150208
~/Downloads$ ./install-tl
This is a LONG process and may take an hour to load the nearly 4000 modules
* Note: If you have file or directory permission issues, run with sudo
~/Downloads$ sudo ./install-tl
Following the Post-Install instructions, Update PATH
Adding texlive to your current session PATH:
~/Downloads$ PATH=/usr/local/texlive/2014/bin/x86_64-linux:$PATH
Adding texlive to your ~/.bashrc file for future sessions:
export PATH="/usr/local/texlive/2014/bin/i386-linux:$PATH"
Testing your current set-up:
In a directory you can write to, try basic document processing:
~$ latex small2e
[...]
Output written on small2e.dvi (1 page, 1780 bytes).
~$ ls
small2e.aux  small2e.dvi  small2e.log
The tikz package is part of the rpf package. The latest TexLive install includes a sufficent version of rpf. Use tlmgr (TexLive package manager) to check your verion of rpf:
~$ tlmgr info pgf
package:     pgf
category:    Package
shortdesc:   Create PostScript and PDF graphics in TeX.
longdesc:    PGF is a macro package for creating graphics. It is platform- and format-independent and works together with the most important TeX backend drivers, including pdftex and dvips. It comes with a user-friendly syntax layer called TikZ. Its usage is similar to pstricks and the standard picture environment. PGF works with plain (pdf-)TeX, (pdf-)LaTeX, and ConTeXt. Unlike pstricks, it can produce either PostScript or PDF output.
installed:   Yes
revision:    33057
sizes:       src: 349k, doc: 13197k, run: 4993k
relocatable: Yes
cat-version: 3.0.0
cat-date:    2014-02-26 21:08:13 +0100
cat-license: lppl1.3
collection:  collection-pictures
The easiest way to install package files is to place them on your TeX search path. To find your default location use kpsewhich (included with TexLive).
Create a default directory on your TeX search path:
~$ kpsewhich -var-value=TEXMFHOME
/home/USER/texmf
Create a tex/latex directory in this location:
~$ cd `kpsewhich -var-value=TEXMFHOME`
/home/USER/texmf$ mkdir tex
/home/USER/texmf$ mkdir tex/latex
/home/USER/texmf$ cd tex/latex
Change to the new tex/latex directory
/home/USER/texmf/tex/latex$ cd tex/latex
Use git** to clone xcolor-solarized locally
Use git to clone the xcolor-solorized repository and create a local xcolor-solorized directory:
/home/USER/texmf/tex/latex$ git clone https://github.com/Jubobs/xcolor-solarized.git
Check to see if gitdags.sty can be seen by TeX
~$ kpsewhich xcolor-solarized.sty
/home/USER/texmf/tex/latex/gitdags/xcolor-solarized.sty
** To install git use:
    sudo apt-get update
    sudo apt-get install git
Similar to the last step in the previous section, use git to clone the gitdags repository and create a local gitdags directory
~$ cd /home/USER/texmf/tex/latex
/home/USER/texmf/tex/latex$ git clone https://github.com/Jubobs/gitdags.git
Check to see if gitdags.sty can be seen by TeX
~$ kpsewhich gitdags.sty
/home/USER/texmf/tex/latex/gitdags/gitdags.sty
Use cut-and-paste to copy the example DAG document file to a local file, for example "dagfile.tex". The use the pdflatex command to create a PDF.
~$ pdflatex dagfile.tex
[...]
Output written on dagfile.pdf (1 page, 86347 bytes).
Transcript written on dagfile.log.
After installing ImageMagick on Ubuntu, I followed the instructions on SO to convert the PDF to a PNG using ImageMagick
To change the PDF to "fit" the diagram rather than be a full page sheet, change the document class to:
\documentclass[preview]{standalone}
Converting the image from pdf to png using:
convert -density 300 dagfile.pdf -quality 90 dagfile.png
